I have what one would call a “black thumb”. You know those articles about plants that anyone can keep alive? Yeah, I’ve killed them all.* So it should come as no surprise that I’ve been wanting to get myself an air plant. They’re supposed to be good for indoor air, and they’re impossible to kill.**
The only problem? I’m super cheap. I’ve seen the adorable planters and hanging planters in stores, but I can’t bring myself to spend double digits on them. Plus, I always get the nagging thought “you could totally make that yourself!”
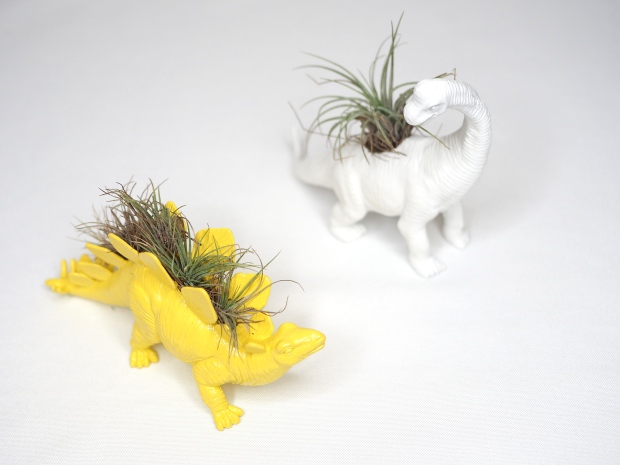
When I finally spotted a couple cute dinosaurs at the Dollar Tree, I knew it was time to make myself a Dino Planter!

Materials needed:
- Cute rubber dino. It needs to stand on its own, so no squishy ones. Other figures work too, it doesn’t have to be a dinosaur!
- Box Cutter (there may be a more elegant/efficient way to do this, but this is what I used.)
- Spray paint. (any color! make sure it says it’ll adhere to plastic)
- Pebbles/weights (Optional. to make sure your dino is stable and that your plants won’t drop all the way down)
- Air Plants. They actually sell these on Amazon and even Target, but if you’re like me and live in South Florida you may be able to find some in the wild. (Might I recomment Matheson Hammock park? It may or may not be where I got mine…)

Step 1: Cut an air plant sized hole into the top of your dino. Be careful to cut AWAY from yourself and watch where you have your fingers. You don’t want blood on your dino! You want to have your air plants in hand before doing this, to make sure they’re going to fit nicely. (Leave space for the air plants to “breathe”.)
Some tips: If you’re doing this project with kids….please don’t let them do the cutting! Depending on your dino it could be pretty tough. My technique for making the hole started with some gentle stabbing motions, followed by slicing. (Its must easier to slice through the plastic once you have the cutter in there.)

Step 2: Spray paint your dino. (You know the drill….make sure you’re in a well ventilated area and protect anything in the vicinity that you don’t want painted. Like your grill, for example.) Wait the recommended drying time before handling again.
Step 3: Throw in some of those pebbles/weights into the dino hole. Doesn’t have to be filled all the way, just enough to keep the dino from toppling over.
Step 4: Nestle your air plant into its new home.

And voila! Your dino planter is done!

*The zizi plant is an excellent suggestion for my fellow black thumbs. I’ve had two that have survived “droughts”, and they even do well in low light situations!
**As I have since learned, air plants need maintenance too….they need to be soaked and then dried every week or so. That sounds manageable, I think…


Those dinosaur planters are cute! I’ll have to try this out and see if my black thumbs turn green.
Adorable and so creative! I’d love to hear an update on how well these grow for you… I’m fabulous at killing indoor plants too, so would love to know if these survive for you! 🙂