In case you haven’t heard, plastic straws are OUT. Metal and reusable straws are totally IN*.
So what do you do when you have bags of straws at home, but you feel like a monster using them to sip on your Fresca, but you also don’t want to throw them out for fear they’ll end up in an innocent turtle’s nose?!
You use them for crafting, duh. More specifically, you use them to make himmeli! And in case merely up-cycling straws is not green enough for you, these himmeli will serve as a perfect outdoor-safe home for your air plants! (Because air plants are totally in too.)

There are two basic ways to make these himmeli: 1) make all the straws the same size to get a cute chubby symmetrical shape, or 2) use longer straws at the top to make an elongated shape. In the steps below I’ll show you how to make the chubby one, and in the last step I’ll explain how to make the changes to make yourself an elongated himmeli!
So, ready to make some himmeli?!

Materials:
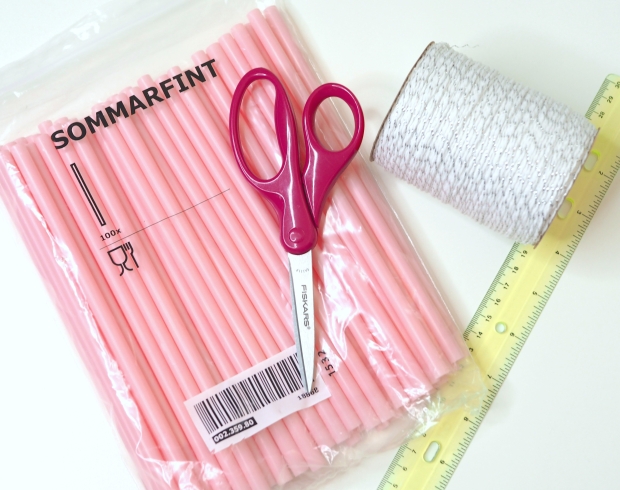
- Straws. Thickness depends on the style you’re going for or what you have at home. I used smoothie straws from Ikea, because that’s what I had on hand.
- String. Cotton, nylon, pretty much anything will do. (If you use skinnier straws or thicker string, you may need a tapestry needle.)
- Scissors.
- A ruler. (Very much optional.)
Step 1: Figure out how big you want your himmeli! You want to make it slightly larger than your airplant so it has room to grow, but not too big that it falls out. (You can either use the ruler to get your measurement, or you can eyeball it and use the first straw as the measurement for the others.)
Step 2: Cut out 12 straws segments. Either all the same size, or 3 sizes: 4 for the top, 4 for the middle, 4 for the bottom. (For maximum mischief, only hold one end of the straw while you’re cutting. Kids and pets will LOVE this.)
Step 3: Cut your string. The math-free way to figure out how much string you need? Line up your longest 4 pieces. Take the string, and measure out that length 4 times. (If you’re using a cotton string or twine, it will help to wrap the ends in tape so they don’t unravel!)
Step 4: Measure out a string length equivalent to 2 straw pieces. (This is going to be your tail, don’t let it go anywhere). Take 3 pieces and string them, then tie a knot at the top (keep that tail in tact!)

Step 6: Next, string 2 more straw pieces, and tie a knot at the bottom this time.

Step 7: Keep repeating this (string 2, tie, string 2, tie), alternating the side that you’re tying, until you’re left with 1 lonely straw piece on the string.

Step 8: Grab the 2 tails that are left, and tie them together.
Step 9: You’re going to be left with a pyramid with 2 hanging flaps. Take both of the tails and string them through one of the “straw flaps” so they come out the other end.

Tie them around the other flap. And that’s it!

Left: Chubby Himmeli; Right: Elongated Himmeli
Now, to make an elongated himmeli you are going to substitute the 1st 2 straws and the last pair (not the last lonely straw) with longer pieces. Like so….

And the last few steps are the same!
Finally, place your air plants in their new home….they (and the turtles) will thank you for it!


*For those who are worried about HOW CAN I DRINK MY BUBBLE TEA WITHOUT BEING A MONSTER, Pretty Candy Pin Co carries some gorgeous Rainbow Stainless Steel Boba Staws! (Edit: Currently sold out, but they should be in stock in a couple of weeks.)


This is a really cool craft!